Unity has a powerful animation editor. The concept is that you attach an Animator component to a GameObject and then attach an Animator Controller to the Animator. An Animator Controller allows you to arrange and maintain a set of Animation Clips and associated Animation Transitions for a character or object. An Animation Clip lets you define animations to GameObject properties along a timeline of keyframes.
I ran into a snag when I tried to animate the Transform.Position property of a GameObject. This works well for an instance of a GameObject in a specific location. However, a problem arises if you try to re-use the animation as part of a prefab or if you move the GameObject to another position. The problem is that the position values stored in the animation clip are absolute, meaning the object will move to the position recorded in the animation (world coordinates), instead of applying the animation relative to the current position of the GameObject prior to starting the animation (local coordinates).
This video tutorial by Erwin Broekhuis explains the simple fix for this, which is to wrap the animated object in a parent object and attach the Animator to the parent instead. However, the video is using the Animation component which has been deprecated in favor of the newer Animator component. It took me a couple attempts to get it working properly so I decided to write this blog post with updated screen shots and steps with Animator.
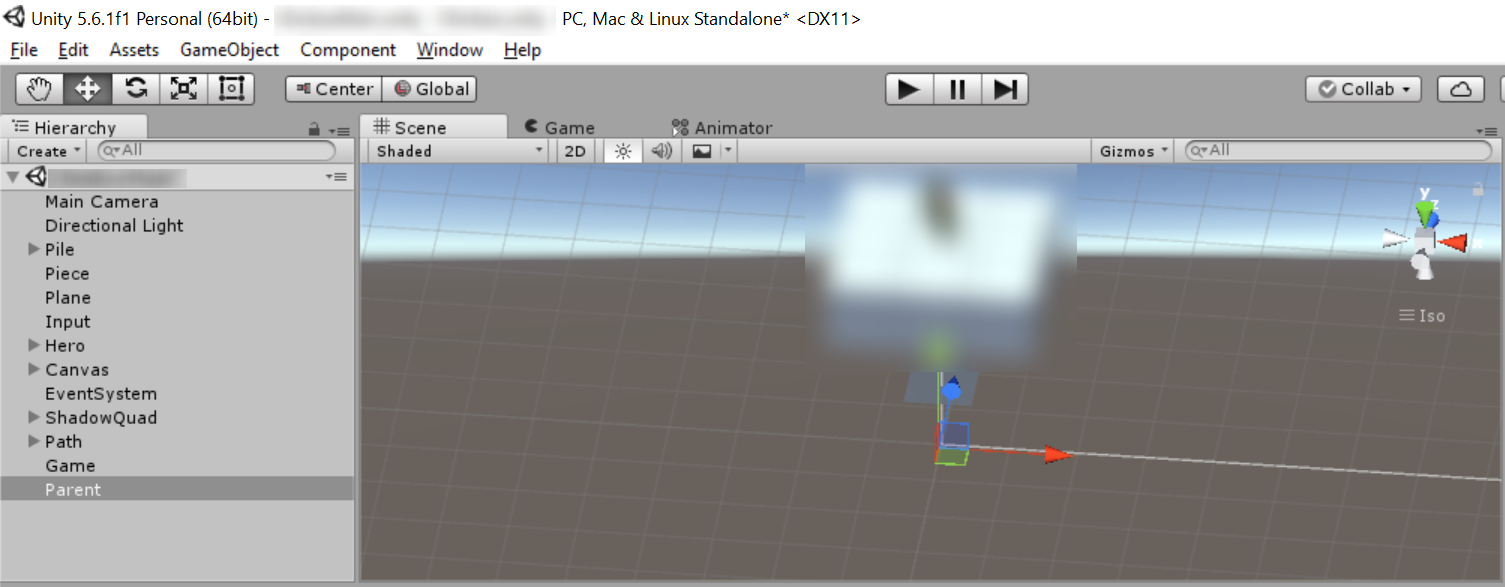
Step 1: Create the Parent Object
Create an empty object off the root of the hierarchy. You can name the parent whatever you like, here it is called Parent.
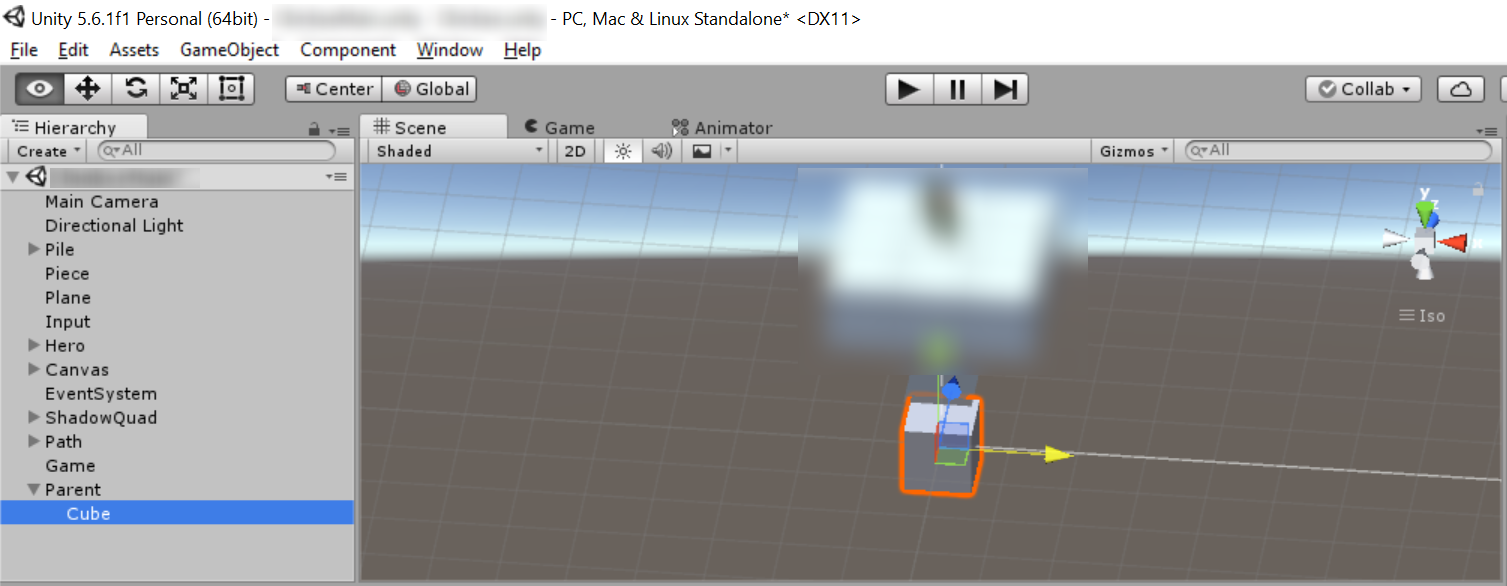
Step 2: Add the Child Object
Add the child object under the parent. In this walkthrough, we are simply adding a Cube 3D object. The child object should default to transform.position (0, 0, 0), which is a local coordinate position relative to the parent. You can name the child whatever you like, here it is called Cube.
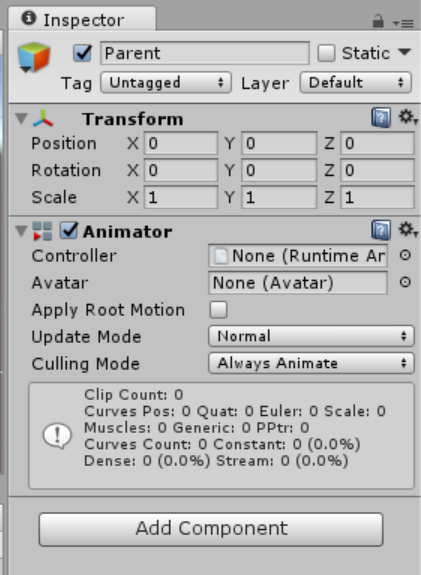
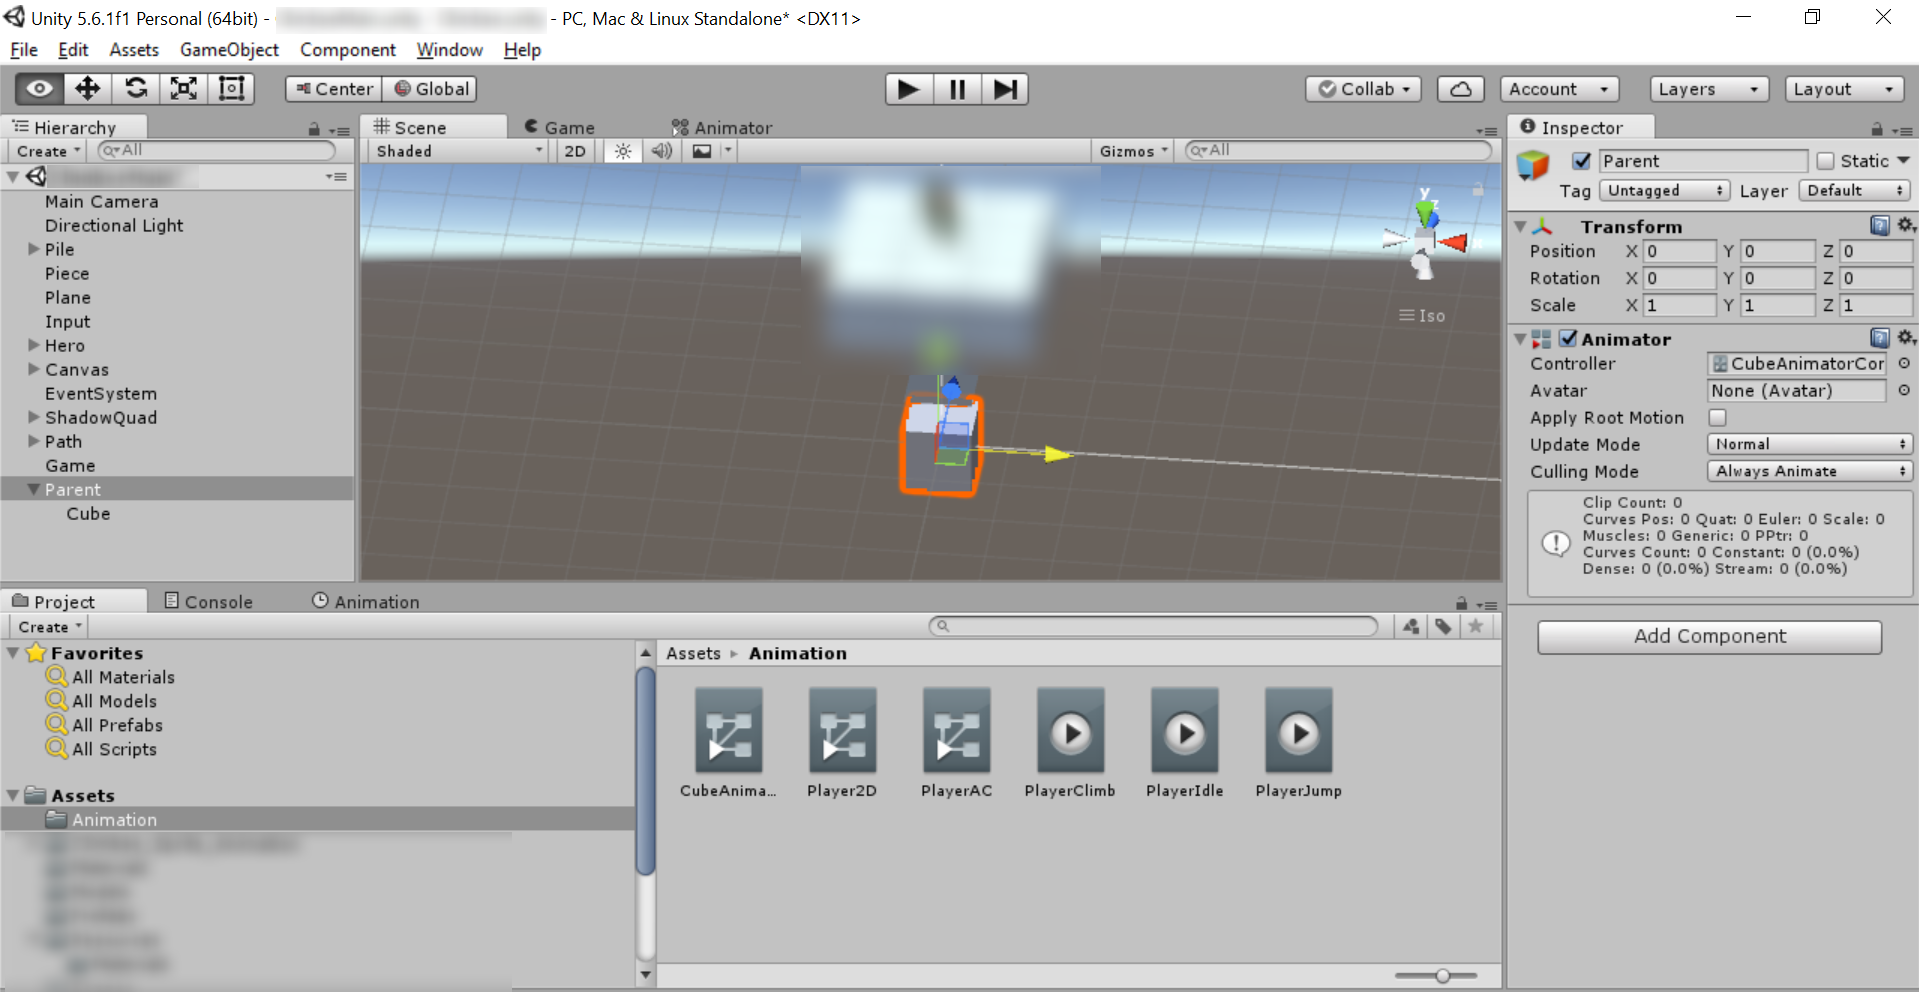
Step 3: Add the Animator Component to the Parent
Add an Animator component to the parent object. The Animator component is found in the miscellaneous category.
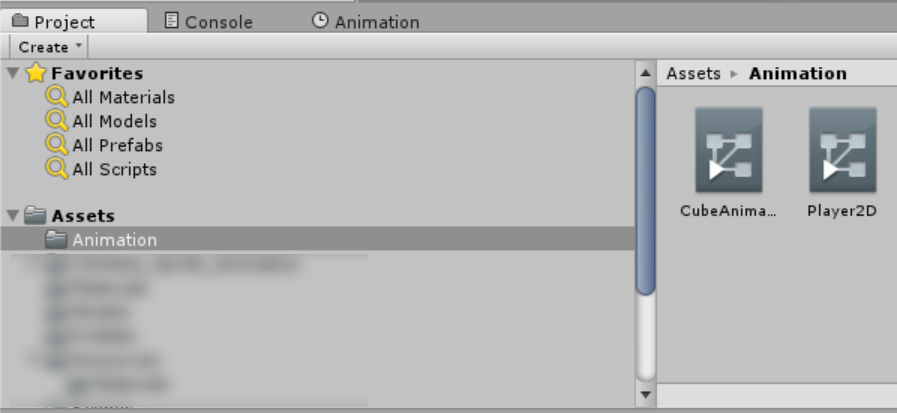
Step 4: Create an Animator Controller
We need to create an Animator Controller to manage the animation clips and state transitions. I suggest creating a folder named Animation to store your animation controller and animation clips. In the Project window, right-click on the Animation folder and choose Create > Animator Controller. You can name the controller whatever you like. Here it is called CubeAnimatorController.
Step 5: Attach the Animator Controller to Animator
Attach the Animator Controller to the Animator by dragging it onto the Controller property of the Animator. To do this, start by selecting the Parent object in the hierarchy then click on the Animation folder in the Project window. Drag CubeAnimatorController from the Animation folder onto the empty Controller box under Animator in the Inspector window.
Step 6: Create an Animation Clip
If it’s not open already, open the Animation window by choosing Window > Animation from the Unity Editor menu. You can place the Animation window anywhere you like. Personally, I like to position the Animation window in the same group as my Project window in such a way that the Scene window is visible at the same time as the Animation window.
Select the Cube object in the Hierarchy window. Click on the Animation tab so that the Animation window is visible. You should be prompted to create an animation clip.
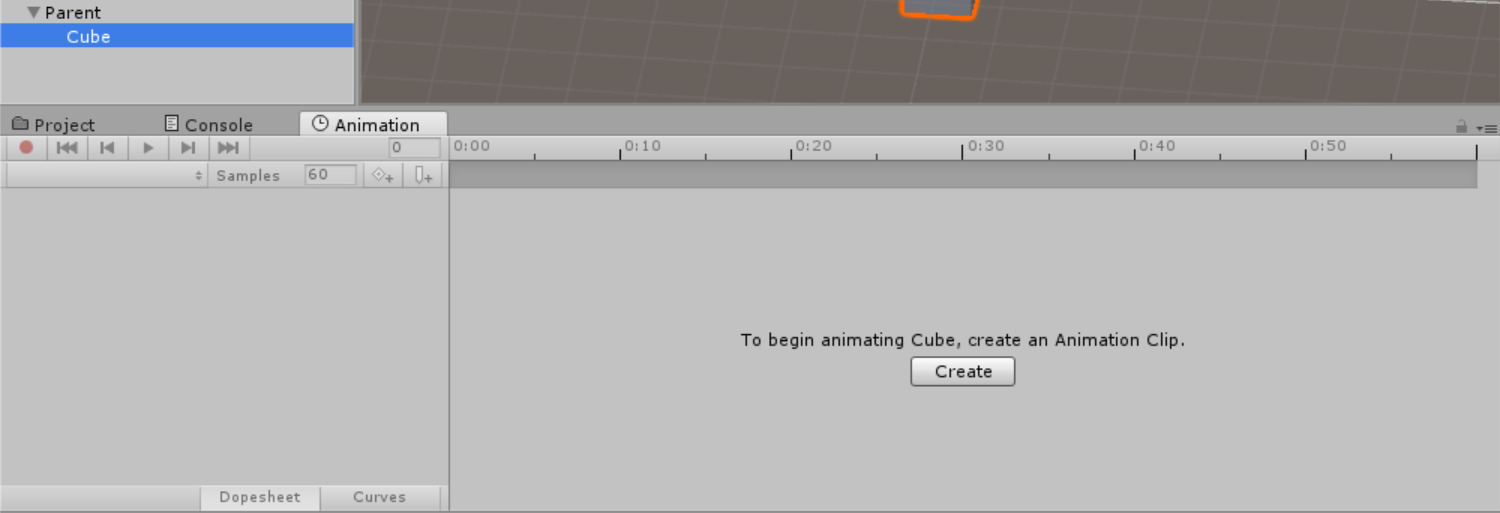
When you press the button to create an animation clip a dialog will open prompting for the location to save the animation clip. I suggest saving it in your Animation folder where you saved the Animator Controller. Name the animation Clip CubeMove.
Note that creating the animation clip also adds a corresponding state for it to the CubeAnimatorController you attached to the Animator. This blog post does not cover anything related to the Animator Controller or state transitions.
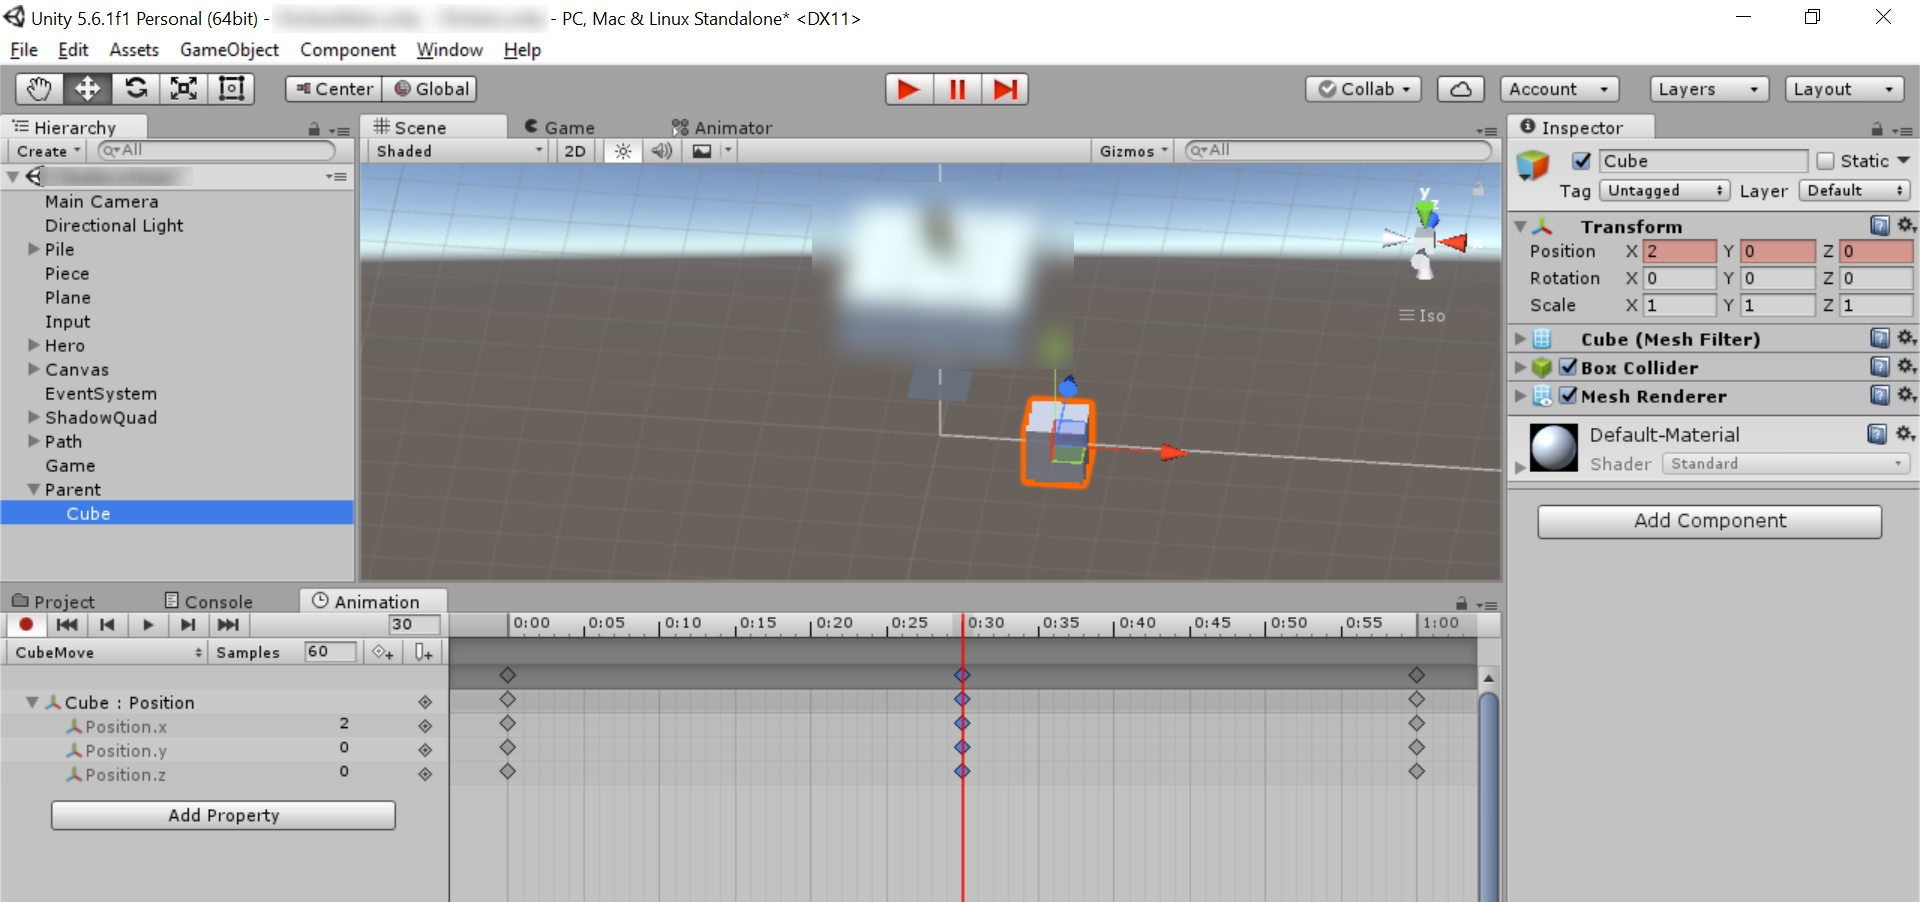
Step 7: Add the Cube’s Transform.Position Property to the Animation Clip
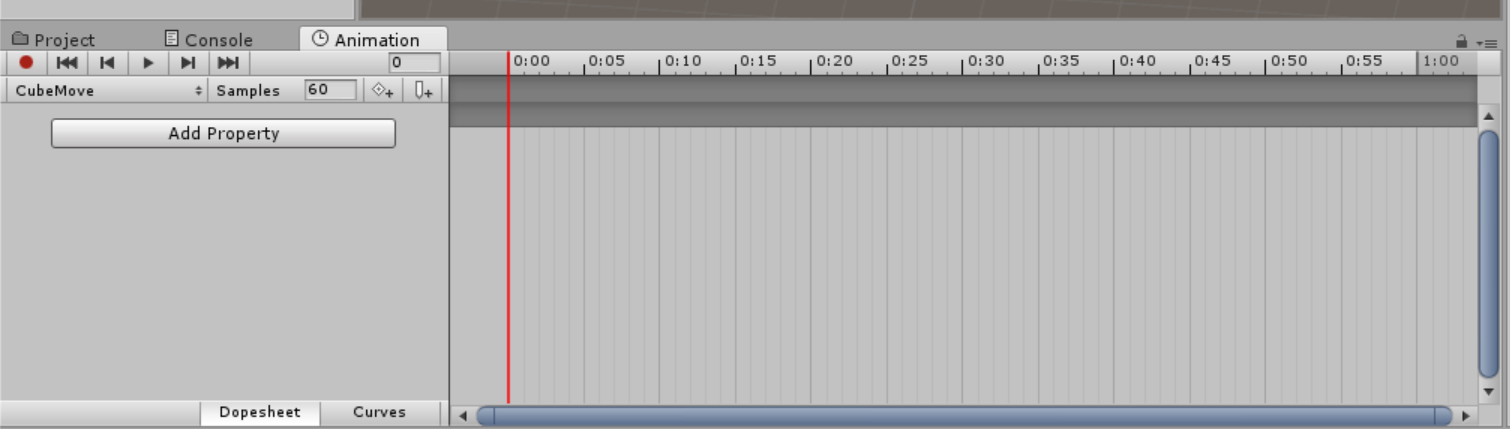
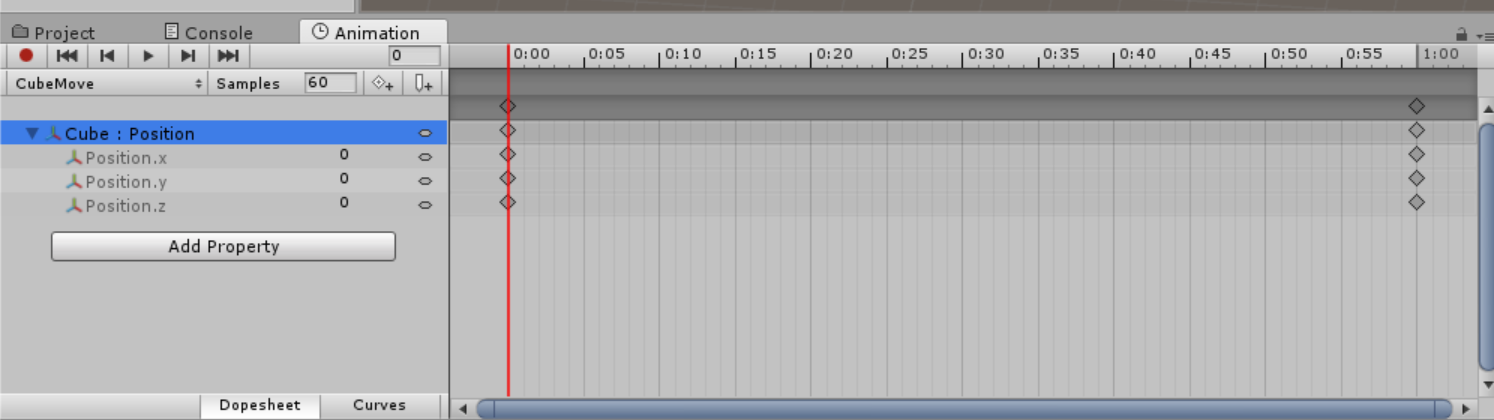
In the Animation window, with the CubeMove clip (state) selected, click the Add Property button. Do not select the root Transform object but instead expland Cube and choose Cube > Tranform > Position.
At this point, you will see the Cube Position property in the Animation window with two keyframes added to the timeline, one at 0:00 and one at 1:00. These times refer to the frame number. By default an animation has 60 samples and will last 1 second at 60 frames per second.
Step 8: Add a Keyframe to the Animation
Click on the timeline at position 0:30 then click the button in the Animation window to add a keyframe. You will notice that the Animation editor will enter “record” mode with a few visual cues:
- The record button will be depressed
- The game Play/Pause buttons at the top of the Unity Editor will be colored red
- The Transform.Position property attributes in the Inspector for the Cube will be colored red
Change one of the Transform.Position property attributes. For example, change X from 0 to 2.
Note: At this point you may see that both the Parent and the Cube objects are selected in the Hierarchy window and that a Transform.Position will be added to the animation clip for both of them. If this happens, right click the Parent Transform.Position and choose to remove the properties from the animation. This is key to ensuring that the animation remains relative to the parent object’s current position.
Click the Record button in the Animation window to stop recording.
Step 9: Test the Animation
Press the Play button in the Animation window to test your animation. You should see your Cube sliding 2 units along the X axis from its start position then return back.
Step 10: Move the Parent Object and Repeat Test
To confirm that the relative position animation works as expected, move the Parent object somewhere else in the scene then click the Play button in the Animation window again. If everything is configured correctly, the animation should begin from the new location of Parent and animate 2 units along the X axis and back. It should not jump to the location where the animation was originally recorded.